
A Pinterest business account is the best place to position your blog’s profile!
You’ll get access to Pinterest Analytics – an essential tool. You can also use promoted pins – paid ads on Pinterest and rich pins – pins that allow you to include your website URL and blog post title.
If you have a personal profile that you want to convert to a business account , you can do this easily. Go to Pinterest for Business and click on Convert now.
Step 1: Create a Business Account on Pinterest
Head over to Pinterest.
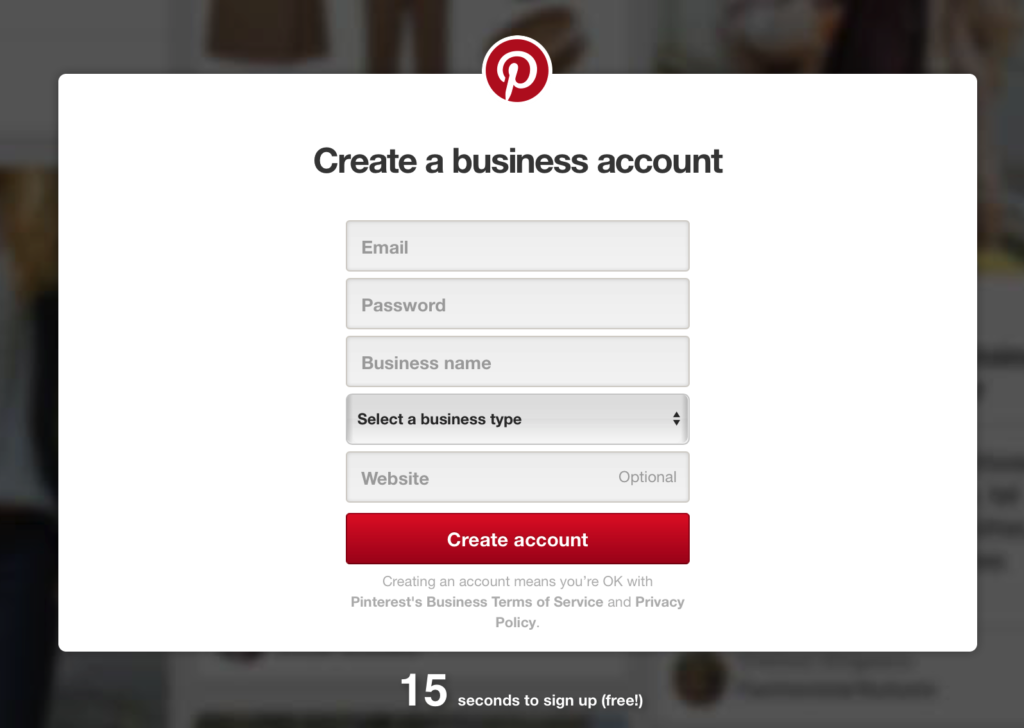
- Enter your custom email address for your blog. If you haven’t created a custom email address for your website, I recommend setting one up with Google’s G Suite. Check out my tutorial here where I explain why. If you don’t have the budget for G Suite just yet ($5 per month), don’t worry – there’s a free option. See my tutorial on setting up a custom email address for your blog for FREE plus how to access your emails via your Gmail account.
- Create a password (don’t forget to write it down!)
- Enter your business name.
- Select a business type.
- Enter your website.
- Create Account.
Pinterest will take you through the process of building a custom home feed for you. Add 5 topics that relate to your niche.
Now you’re in!
Step 2: Set Up a Pinterest Profile
Your Pinterest Profile is super important because it tells people exactly what you’re about. Who you help, and how you help them. You don’t get much space so use it wisely.
To access your profile settings, in the top right hand corner, hover of the circle icon and select Settings from the dropdown menu.
You can change your settings here as well as create your profile.
Scroll down to Profile.
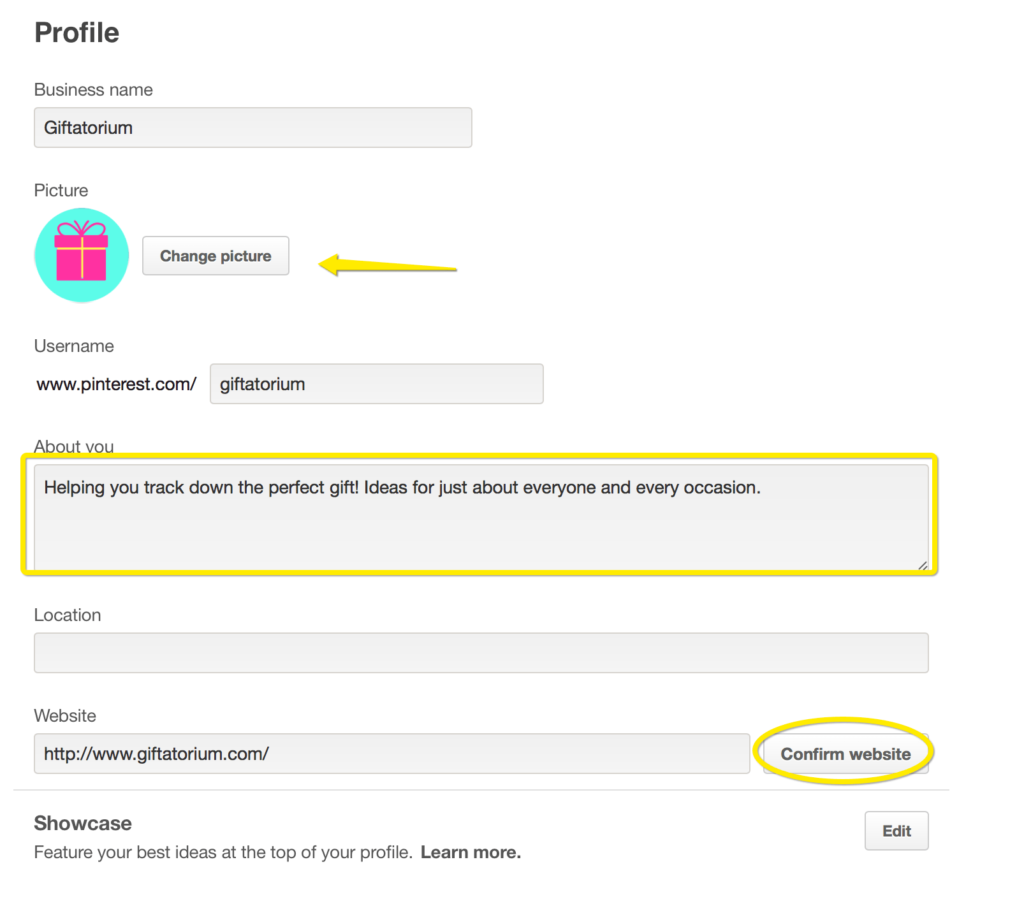
- To add an image, click on Change picture and select your image file from where you saved it. Canva is a great tool for creating images like this + it’s free!
- Fill out the About you section. Be descriptive and because Pinterest is a search engine, use key words that describe your niche. This is also a great place for a call to action.
- Enter your location.
- Save settings.
Step 3: Confirm Your Website
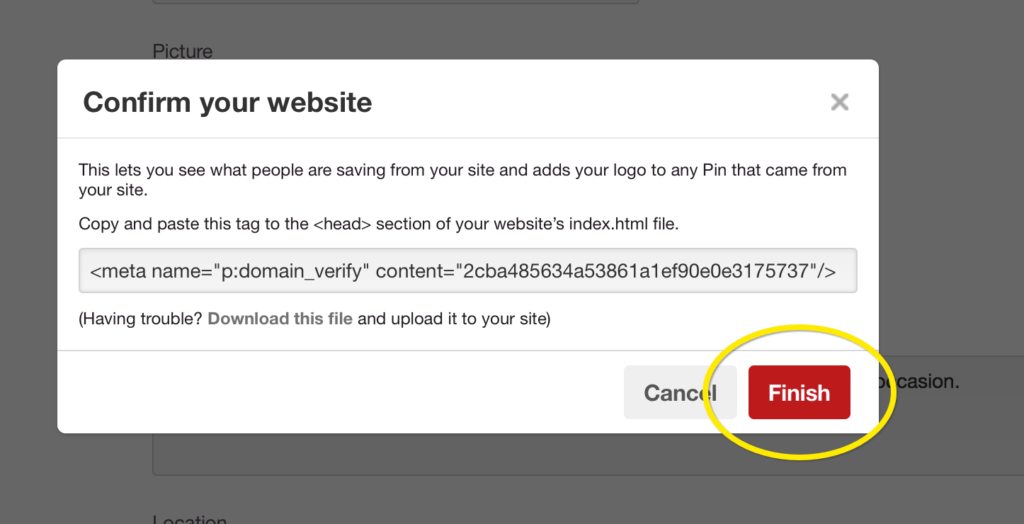
Once Pinterest has confirmed your website, you will get access to website analytics so you can see what people are saving from your website.
Go to Settings (from the top right drop down menu) and under Profile, click on the Confirm Website button.
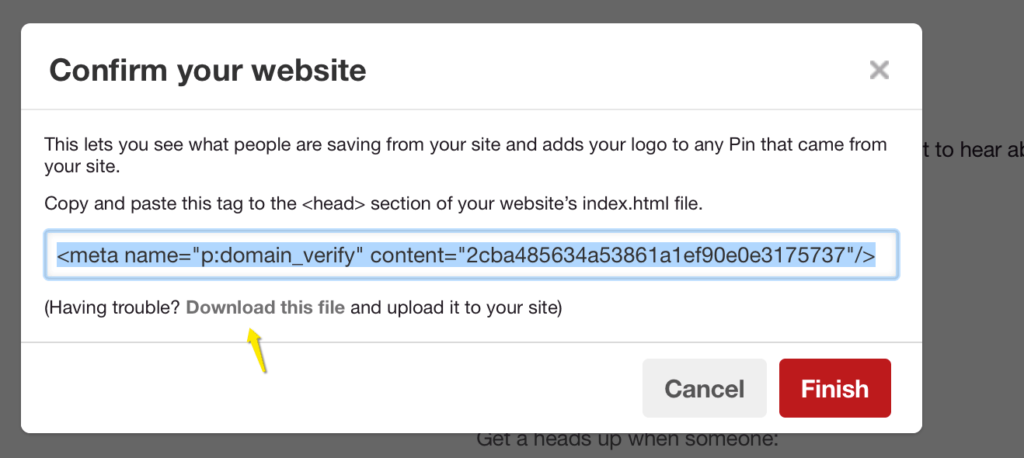
There are two ways you can confirm your site.
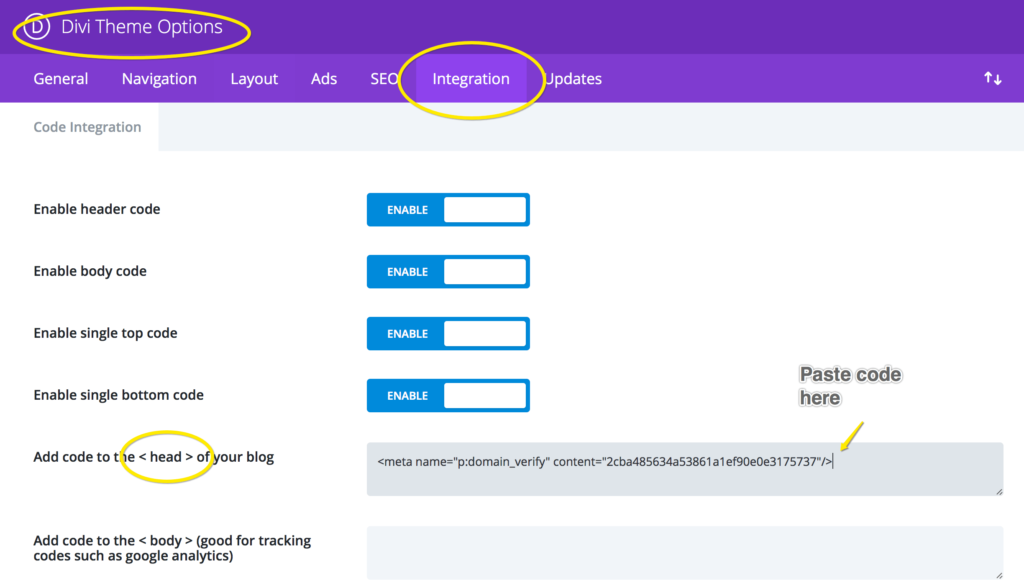
Copy the tag to the <head> section of your website
Copy the tag provided that looks like this (see above image):
<meta name=”p:domain_verify” content=”2cba4856323432421a1ef90e0e3175737″/>
In my tutorials I use the Divi theme. If you’ve been following the Starting Smart Online tutorials, you can add the code in your WordPress dashboard under Divi Theme Options>>Integration. See below.
Otherwise, add it to the <head> section of the index.html file of your website before the <body> section
Upload an HTML file to your site
Alternatively, you can add the HTML file to your site.
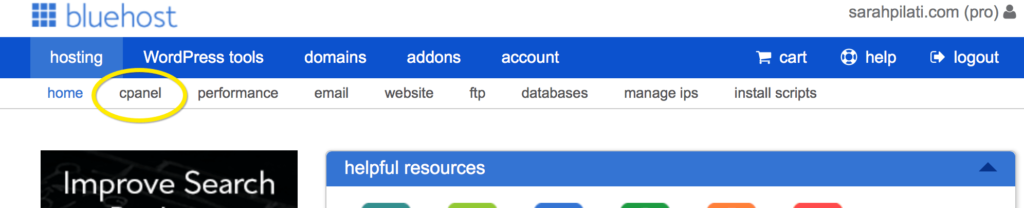
After clicking on the Confirm Website button, instead of copying the tag, click on Download this file (see the yellow arrow on the image below).
Now, go to your hosting account and log in to your cpanel.
Click on the File Manager icon.
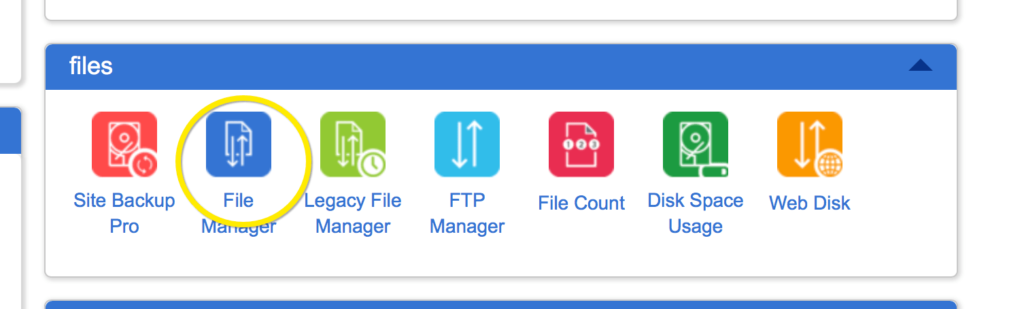
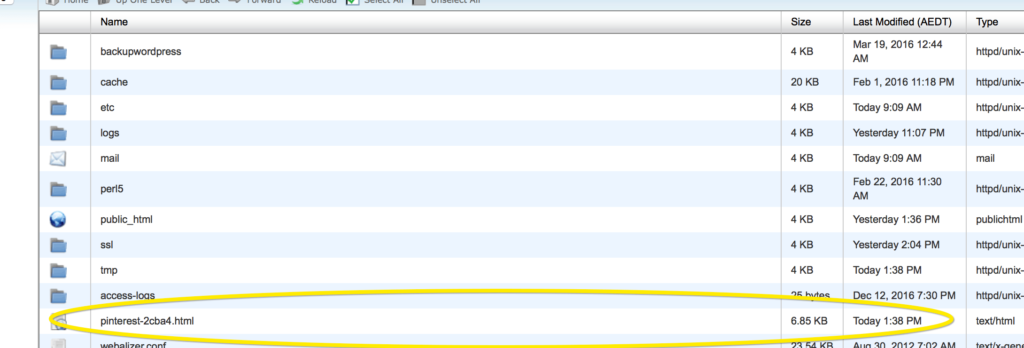
Pinterest requires you to upload the file to the directory of your primary domain (not addons or subfolders – if you don’t have any other websites you don’t need to worry about this).
Click on the Upload button.

Next, click on Choose file and select the file for the place where your downloads are sent.
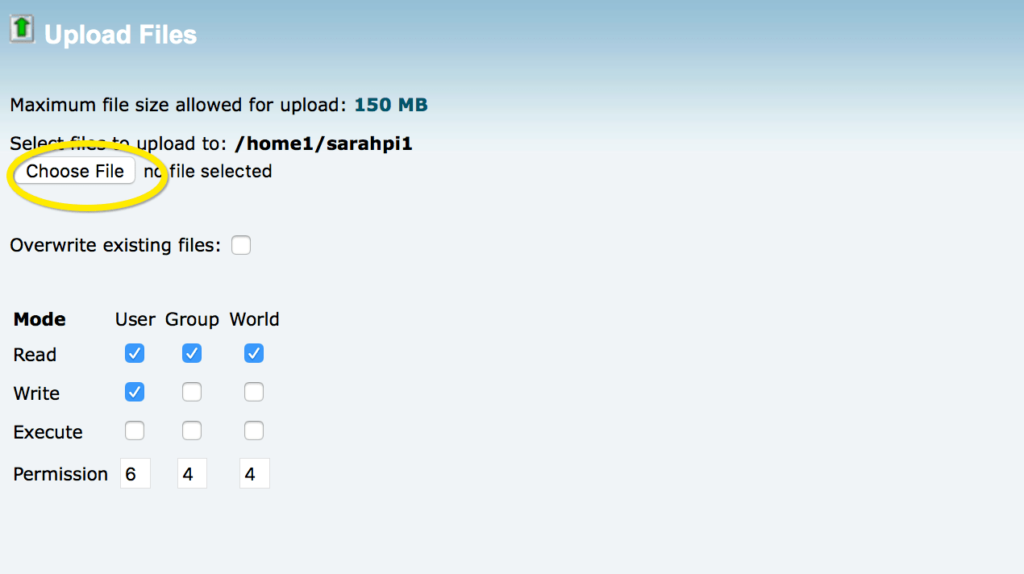
Pinterest notes: “Be sure not to rename the file when you upload it to your server, since we’ll be looking for an exact name match. For example, if you download pinterest-9d541.html, we won’t recognize it if you upload it with a different name, like pinterest-9d541-1.html.”
The uploaded file should appear like this!
Once you have uploaded the file, go back to Pinterest and click on Finish.
It may take an hour or so for Pinterest to validate your website. If it takes longer, I would recommend sending a message to Pinterest here.
Tip: Log in to lodge your query and then select Business accounts and then Confirm website

You might also like…

AUTHOR: SARAH PILATI Hi, I’m Sarah! I’m here to help you create your first WordPress blog. I cover the early stages of your project – getting your website up and running! If you have any doubts you can do it yourself, this website is for you! You can get started here.


0 Comments