
OK, so for those of you that have made it this far through the Starting Smart Online tutorials – Well done you! Just to recap your achievements…so far you have:
- Chosen a topic for your blog
- Named your blog
- Learnt how blogs make money
- Chosen a blogging platform (self-hosted)
- Chosen a website creation software (WordPress) and finally
- Chosen a theme (Divi)
Drum roll please.
Now it’s time to DO IT. Yes, you will need your credit card.
In this tutorial we’ll register your domain name. Then we’ll sign you up for hosting and install WordPress to your site.
If you don’t have a domain name to register yet, check out my post on choosing the best name for your blog or business.
So just to recap…your domain name is the unique name that follows the “www.” in the web address and ends in a domain extension like “.com”. If you can grab hold of the .com extension for the domain name you want – which is the best option, you’re lucky, move quickly!
For a full list of domain extensions go here.
What’s a Domain Name Registrar?
A domain name registrar is an organization that manages the reservation of internet domain names. A registrar allows you to search for names and check their availability.
Domains names aren’t actually bought or sold. They are rented for a period of time for a fee, usually one or two years and then require ongoing renewal. Renewal can be automatic or manual.
I would recommend purchasing both the domain and hosting through the same company, cutting out an additional step in the process that can be quite confusing if you haven’t done this before (pointing your Domain Name Servers to your web host).
What is Web Hosting?
A web host provides space for your website on a server and makes your website able to be viewed by others on the Internet by providing connectivity.
Which Registrar and Web Host Should I Choose?
Good question!
Starting out, the most affordable option is what’s called “shared hosting”. Shared hosting means you share space and resources on a server with other customers.
As the size of your website grows and the amount of traffic to your website increases, you can consider upgrading to your own dedicated server or even changing your host provider.
My two favorite hosting companies for shared hosting are GoDaddy and Bluehost. In the recent past, I had a company with a girlfriend and we used GoDaddy as our host provider. They were really good and had a fantastic feature called the Installatron plugin. I currently use Bluehost for my websites. So although I recommend either, I’ll be using Bluehost for my tutorials.
Why Bluehost?
As a beginner, I want to make sure you get through this setting up process as quickly as possible so you can spend time on your blog or business. This admin part can suck up way too much of your time. I find Bluehost really easy to navigate + there are loads of blog posts and tutorials on how to do pretty much everything.
The WordPress Install (which we will go through later) is super easy, the customer service via chat or phone has been excellent and their on call 24/7. You receive a free domain when you sign up for web hosting + they offer a money back guarantee. So if things go wrong for some reason you’re covered.
The links in this post are affiliate links which means I earn a commission if you choose to purchase at no cost to you. Thanks for your support and rest assured, I only ever recommend products that I currently use. I use Bluehost to host all my websites.
If you’re ready to sign up, follow this step by step guide to registering a domain and setting up hosting with Bluehost.
Step-by-Step Guide to Signing Up With Bluehost
To register your domain name and sign up for hosting, head over to Bluehost.
Choose a Plan
The first thing you’ll be asked to do is select a plan. The basic plan allows for one website. If that’s what you’re after, easy done. If you think you might end up creating more than one blog or website, then for a small amount extra you can purchase the plus plan and have an unlimited amount of domains. This is the most popular option.
Select the option you want.
Register Your Domain Name
Enter the domain name you would like to register eg: yourblogname.com and click on Next.
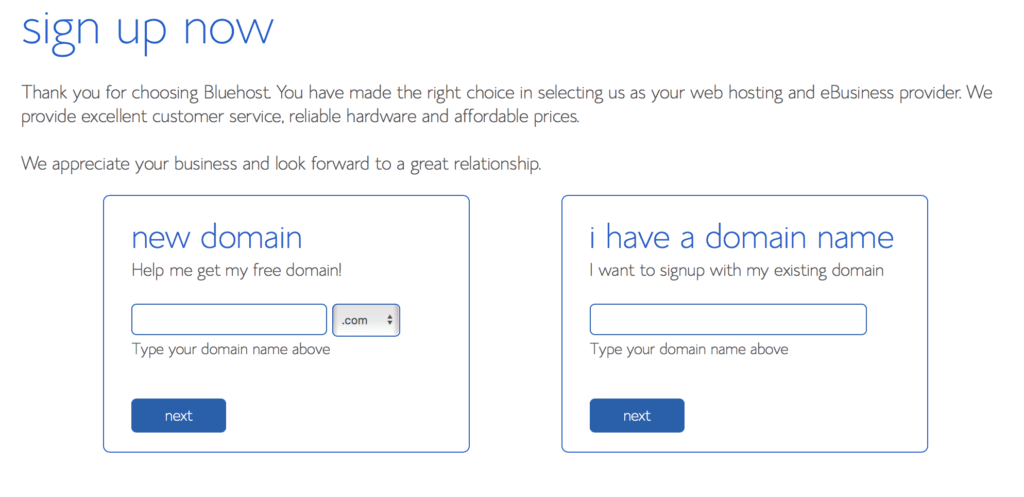
If your domain is not available, Bluehost will provide you with suggestions of similar names and alternative extensions.
Enter Your Account/Package Information
Fill in the account information.
Next, the package information will display a price for the introductory offer which is for a 36 month period. If you scale back to two or one year, the price increases.
If you choose 12 months, then the full price will kick in after the first twelve months. So it is ALOT cheaper to go with the 36 month option. Because they have the money-back guarantee and you are not locked into a contract I recommend going with this option.
So let’s take a look at the addons.
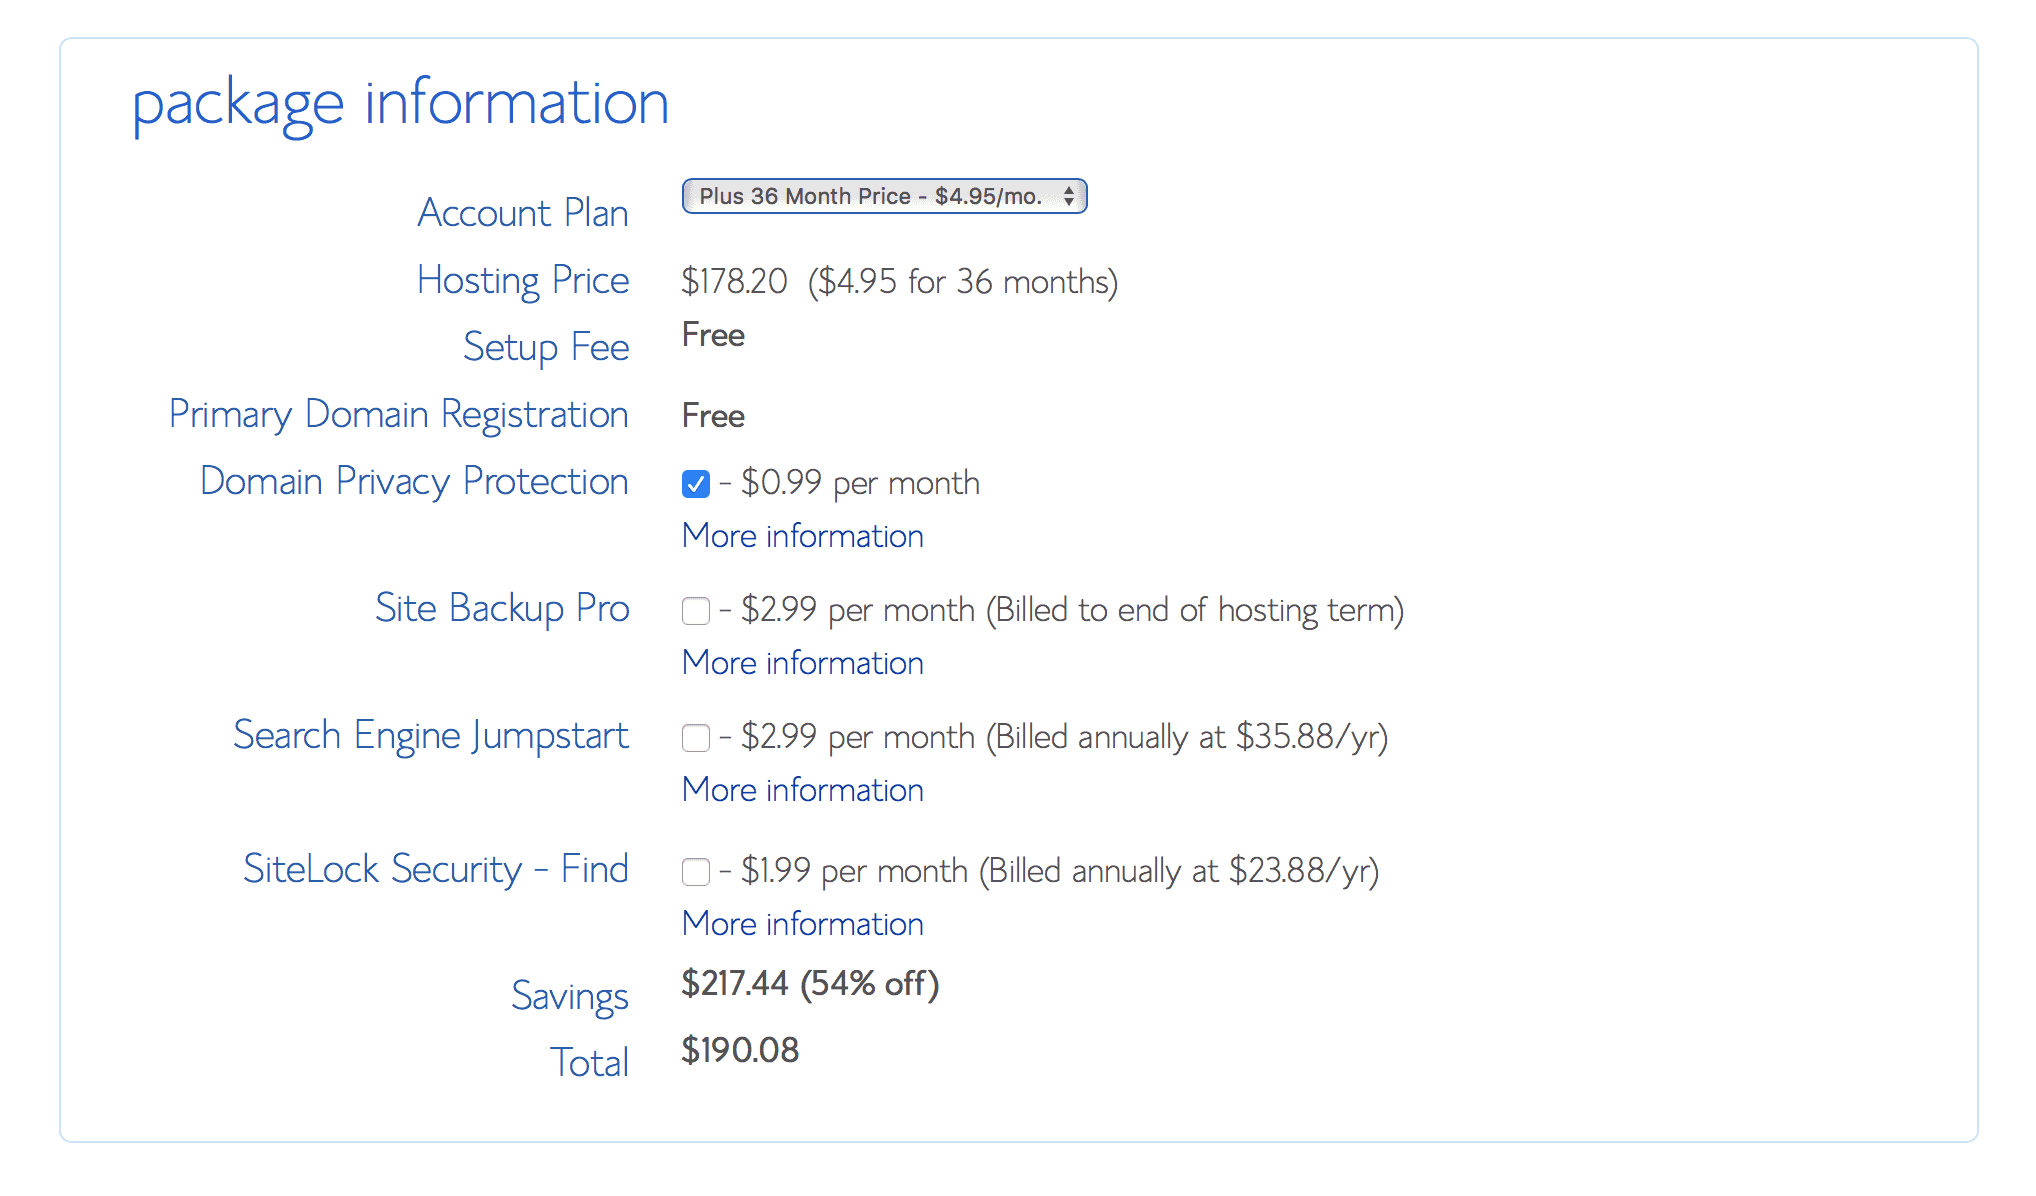
Domain Privacy Protection
I’ve always ticked this box just because. I wanted to see what would happen if I opted out. So, I didn’t renew this on one of my one of my domains. After about 24 hours I started receiving loads of spammy emails and receiving phone calls through the day into the depths of the night from all over the world. NIGHTMARE. First thing the next morning, I logged on and paid the renewal fee. Phew. I still had to wait a few days for the calls to stop. So what happened there? All domain registrants are listed on a public registrar WHOIS. With Domain Privacy Protection, the details of your hosting provider are listed in the directory, instead of your own.
Site Backup Pro
I include this in my package. It’s like having an insurance policy on an asset. You just never know what’s gonna go down! You can choose to do this manually if you prefer.
Search Engine Jumpstart
SEJ is what’s called rapid indexing and will basically get you on Google, Yahoo and Bing. Save your $35.88 a year. That’s a hefty charge considering you can easily do this manually. We’ll be covering this later when we create a sitemap and tell search engines about your blog.
SiteLock Security – Find
Familiar with the little lock icon? That’s SiteLock Security. Check the additional information for more details and decide if this is something you will need for your blog. Complete your Account Information and click on Submit. Once you’ve set up your password and your logged into your account you can install WordPress.
Install WordPress
WordPress is a website creation tool that allows you to create a website and upload content really easily with little or no coding. For more info on why WordPress is a great option for your first blog, see Why Use WordPress for Your Blog?
Bluehost allows you to install WordPress in a couple of clicks.
Select hosting in the top menu bar.
Click on the Install WordPress icon – see below, highlighted with the yellow circle.

Select your domain and click Next.

You can choose the version with or without the www. It’s just a personal preference thing. This is how your website will look when returned by a search engine. For example; www.startingsmartonline.com or just startingsmartonline.com. On the next screen click Install.

Shortly, you will see a message telling you that installation is complete.

Where you see “Continue browsing the Marketplace of View credentials here”, choose to view the credentials. Your WordPress username and temporary password will be displayed.
You’re ready to login to your WordPress website and start creating!


Fantastic! You’re in. You should now see the WordPress Dashboard which should look something like this.
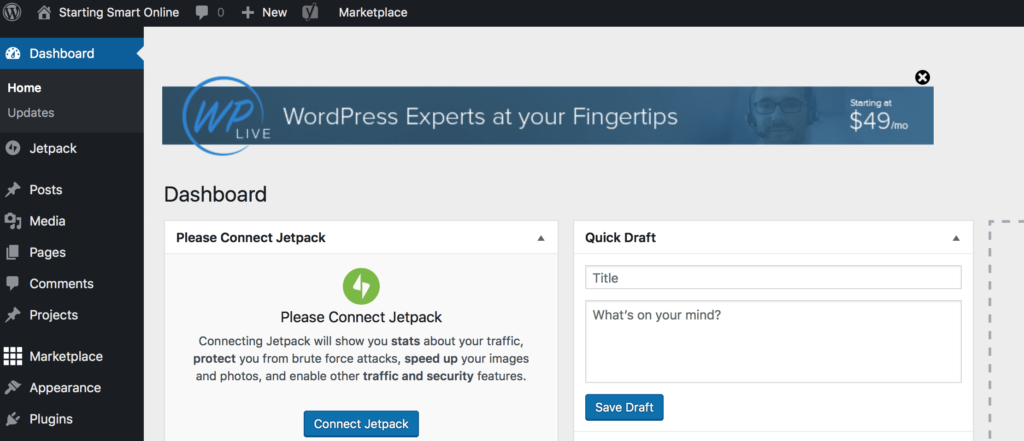
Well done you! Now you’re ready to get started creating your blog!
In the next tutorial, I’ll take you through the WordPress settings and show you how you can change your password, then we’ll install a theme. Click on the red button below.


AUTHOR: SARAH PILATI Hi, I’m Sarah! I’m here to help you create your first WordPress blog. I cover the early stages of your project – getting your website up and running! If you have any doubts you can do it yourself, this website is for you! You can get started here.


0 Comments