

One of the final steps before launching your blog is setting up a custom email address. You want your blog to look professional from day one. That’s why it’s best not to use your free personal account such as yourname@gmail.com.
In this post we’ll set you up with a professional email address that will look something like info@yourblogsname.com.
You can do this for free by creating an email address for your website in your web hosting account and importing the address into your free account (eg:Gmail or Hotmail). I don’t recommend this option, at least not in the long term. For only $5 per month you can have G Suite (formally Google Apps) host your business emails.
Here are the reasons why this is great option for your new blog.
- It’s better to separate your email host from your web host. If the web server goes down you not only lose access to your website, you lose access to your email
- It’s easier to move web hosts if you have your email hosted elsewhere
- Less restrictions on storage
- G Suite provides the flexibility for your business to grow
- You can be logged into your personal account and your business/blog gmail account at the same time
How to Set Up G Suite (formerly Google Apps)
Go to gsuite.google.com where you can sign up for a free 14 day trial.

Create an Account
Enter your account information. 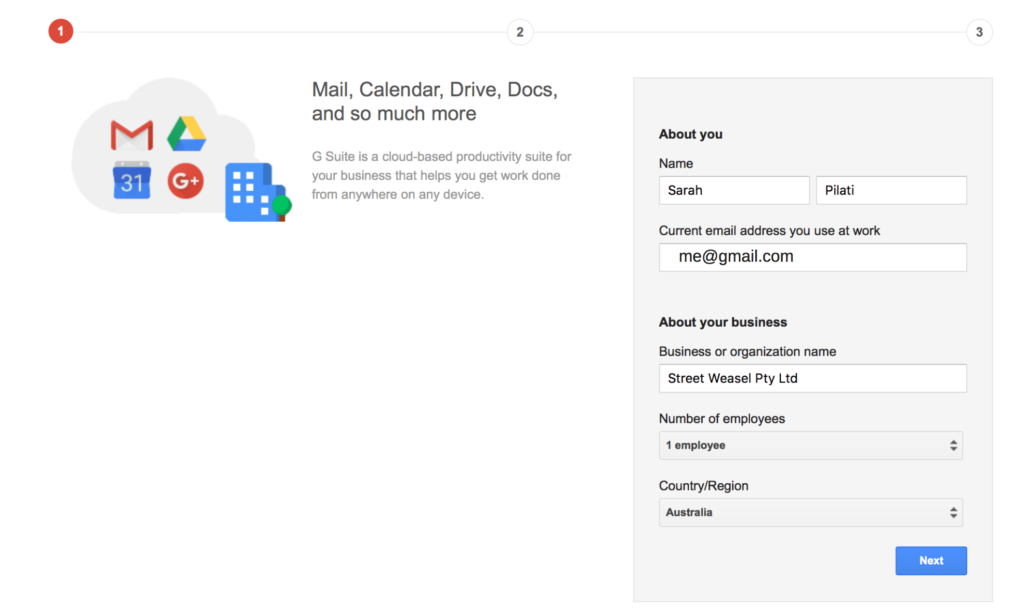
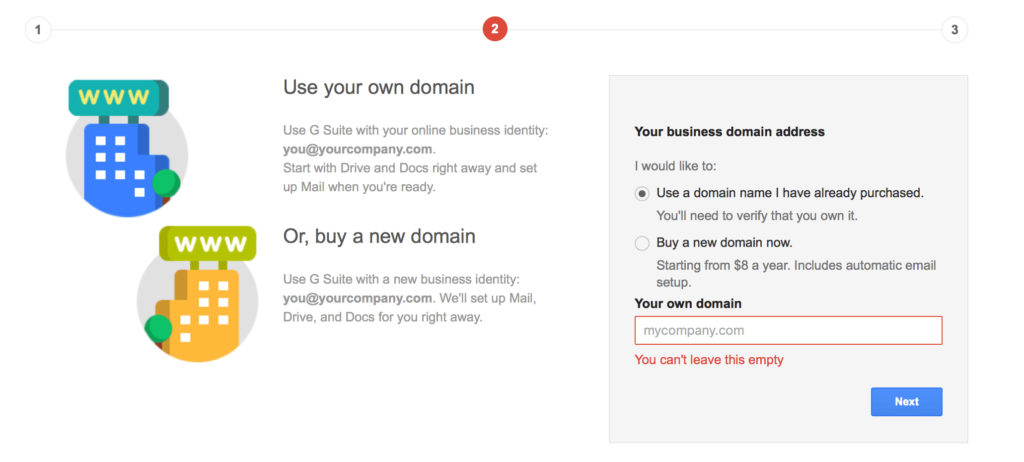
Check Use a domain I have already purchased. A box will appear where you enter your website address.
Create a user name and password.
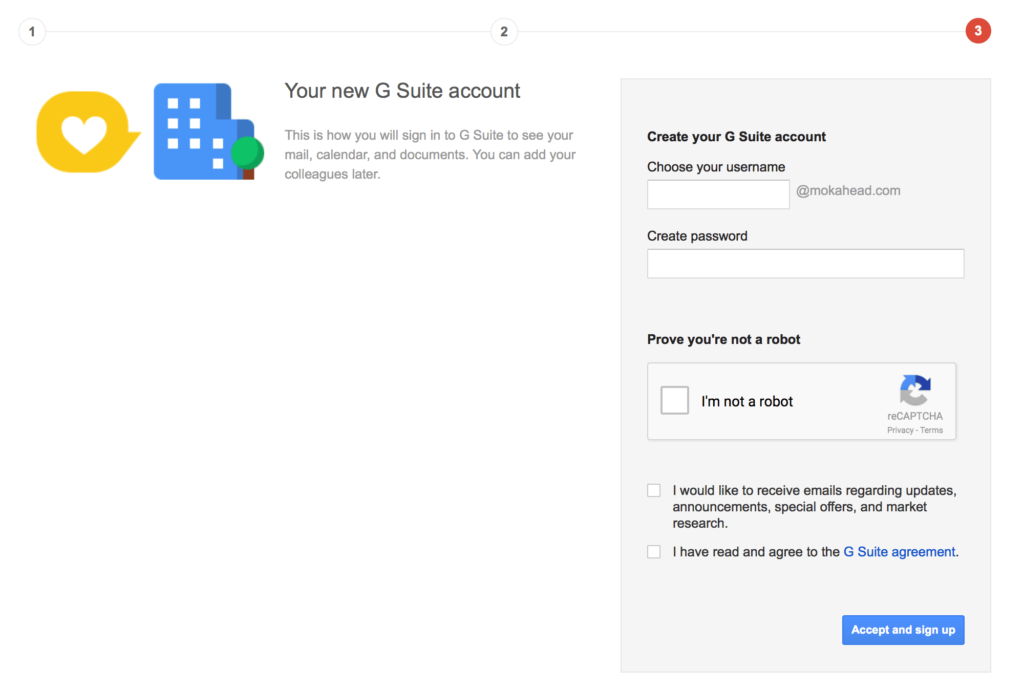
Click Accept and sign up.
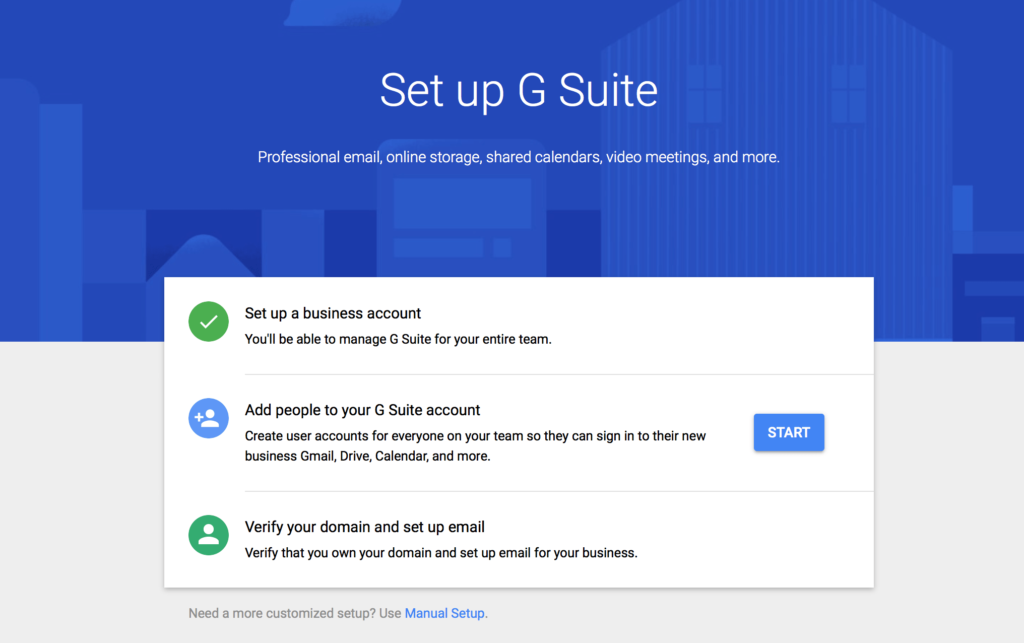
Now, click on Start to add a user and complete.
Verify Your Account
You will be required to verify your ownership of the website. Select the verification method you prefer.
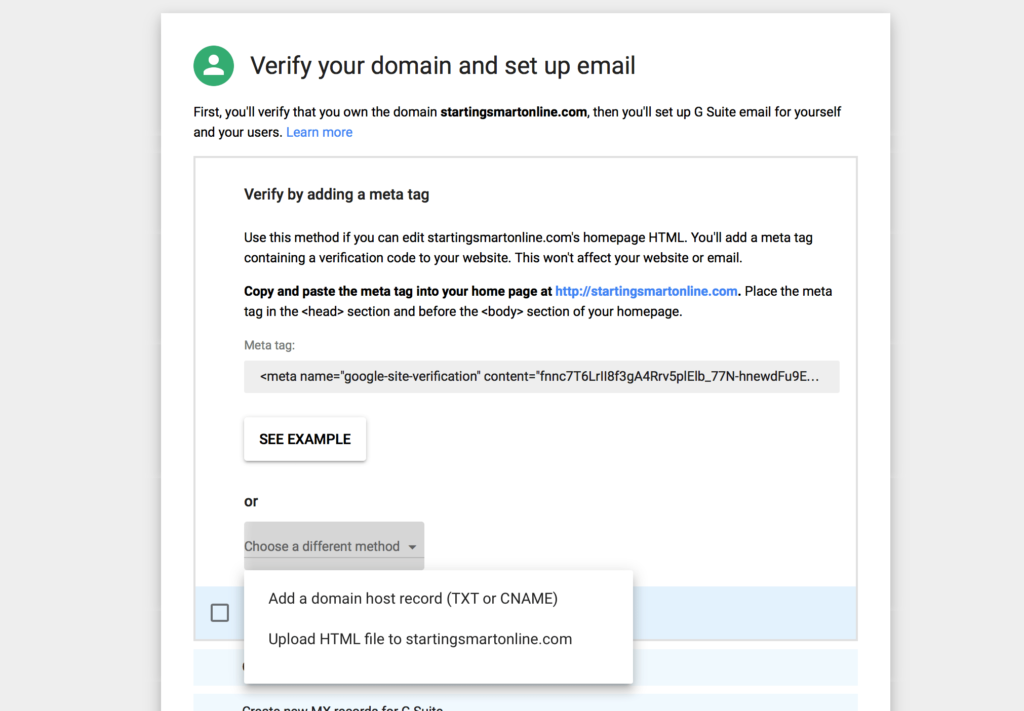
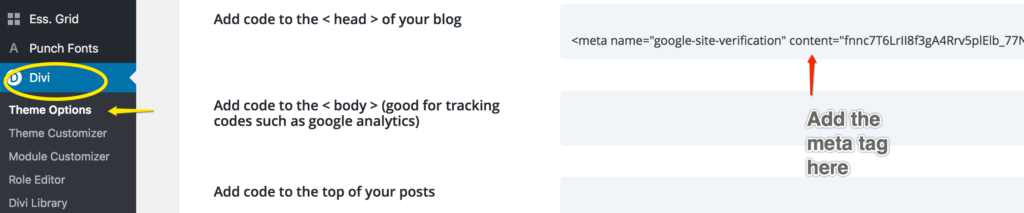
If you’ve been following the tutorials and you’ve installed the Divi theme by Elegant Themes, you can go to Divi in your WordPress dashboard and select Theme Options.
In the purple navigation bar, click on Integration.
At Add code to the <head> of your blog, copy and paste the meta tag from G Suite.
Save.
Redirect Your Email to the Google Servers
Once your website has been verified, you need to redirect your custom email for your website to the Google servers.
To do this, you need to login to your hosting account. Follow the G Suite Wizard instructions here by selecting your web host.
If you are following these tutorials, and you’ve set up your hosting with Bluehost, here is the link for the Bluhost set up: Bluehost Set Up G Suite MX Records
Once you MX Records have been updated, you can log into your new custom email account!
Click on the link for Google’s instructions on how you sign in to multiple accounts at once.
Don’t forget to add your new custom email address to your contact or about page and your legal pages (…if you require them. Not sure? see here).

You might also like…

AUTHOR: SARAH PILATI Hi, I’m Sarah! I’m here to help you create your first WordPress blog. I cover the early stages of your project – getting your website up and running! If you have any doubts you can do it yourself, this website is for you! You can get started here.


0 Comments