
Setting up a custom email address is super important if you want to look like a pro from day one!
A custom email address is not something like startingsmartonline@gmail.com. A custom address has your blogs name after the “@” sign.
For example, my custom email address is sarah@startingsmartonline.com.
I recommend setting up your custom email address with Google’s G Suite for a small cost of $5 per month.
Here are the reasons why.
- It’s better to separate your email host from your web host. If the web server goes down you not only lose access to your website, you lose access to your email
- It’s easier to move web hosts if you have your email hosted elsewhere
- Less restrictions on storage
- G Suite provides the flexibility for your business to grow
- You can be logged into your personal account and your business/blog gmail account at the same time
If you don’t have the budget for G Suite just yet, no worries! You can set this up for free until you can afford to switch.
In this tutorial, I’ll cover how to create an email account for your website plus how to access your email with your personal Gmail account.
You can view and manage your emails in your hosting account but as you can imagine, it’s much easier to access your emails via your Gmail account. If you don’t have a Gmail account, you can set one up here.
Create a New Email Account for Your Website
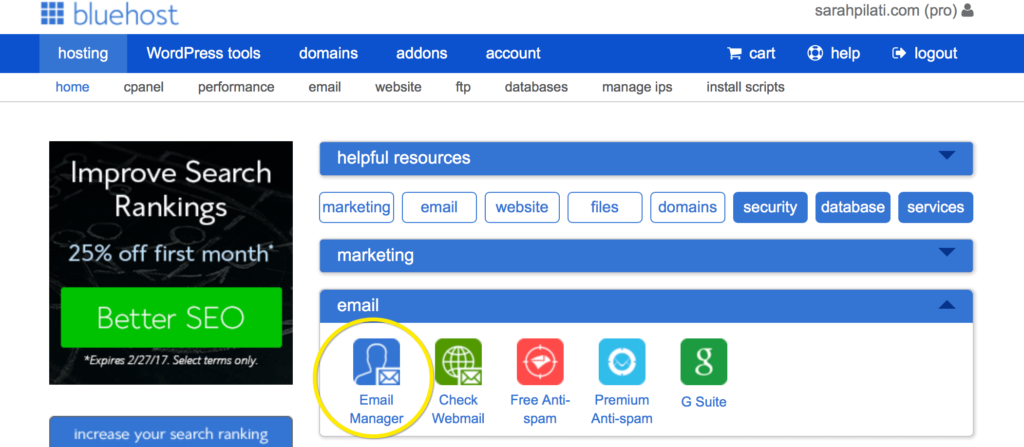
Log in to your hosting account. In my tutorials I’m using Bluehost.
In the control panel, click on the Email Manager icon.
Click on create an email account.
Enter the user you would like to create an email address for. This could be your name or something like “info” or “admin” or “crew”. Then select your website from the drop down box.
Choose a password (don’t forget to write it down!).
Select the mailbox storage size you would like and then click Create.
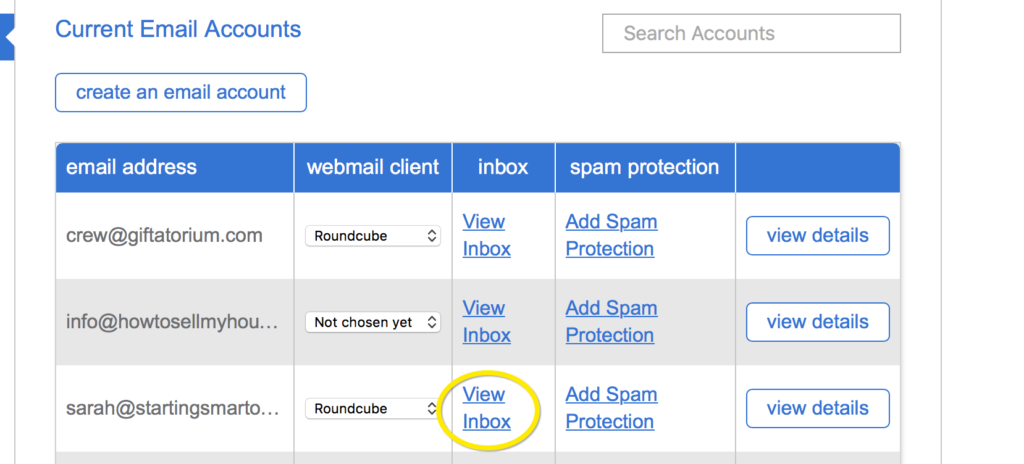
That’s it, you now have a custom email address. To view your messages, click on View Inbox.
How to Access Your Emails Via Gmail
Log in to your Gmail Account.
In the top right hand corner click on the Settings cog/gear icon and select Settings from the drop down menu.
Select the Accounts and Import tab
Click on “Add a POP3 mail account you own” or “add an email account” (if you are already importing other email addresses).
A yellow pop up box appears, add the email address you want to import. This is the email address you have just set up in your hosting account.
Click Next.
Check Import emails from my other account (POP3) then click on Next.
Now, at Username type in your email address.
Type in your email password.
Keep the Server unchanged. This is “mail.yourdomainname.com”
Tick the options you want to use. If you choose to use a secure connection, you will need to change the port from 110 to “995”.
Click on Add Account.
Next, you can select to send mail as your new email address.
Choose this option and click on Next.
Next you can choose the name you would like to appear on an email that you send. Enter the name and click Next Step.
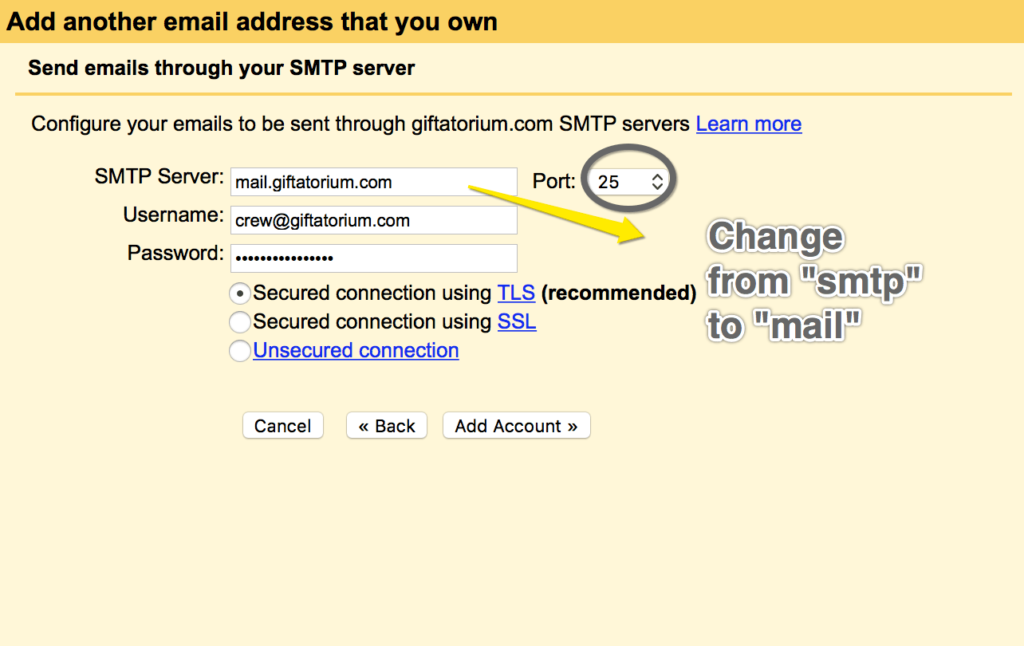
To send emails through your SMTP server (see image below), use Port 25 (or Port 465 if you are using SSL).
At SMTP Server: change from “smpt” to “mail” to read “mail.yourwebsite.com”.
The Username is your email address and enter your email password.
Keep Secured connection using TLS checked.
Click on Add Account.
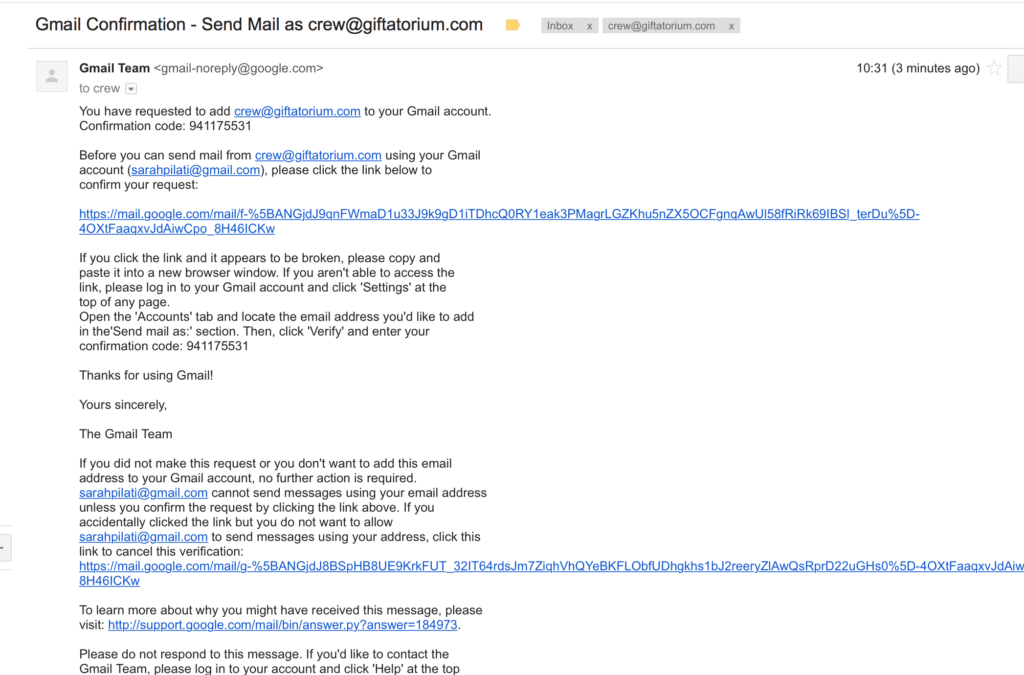
You should receive a confirmation email in the next few minutes, like this one!
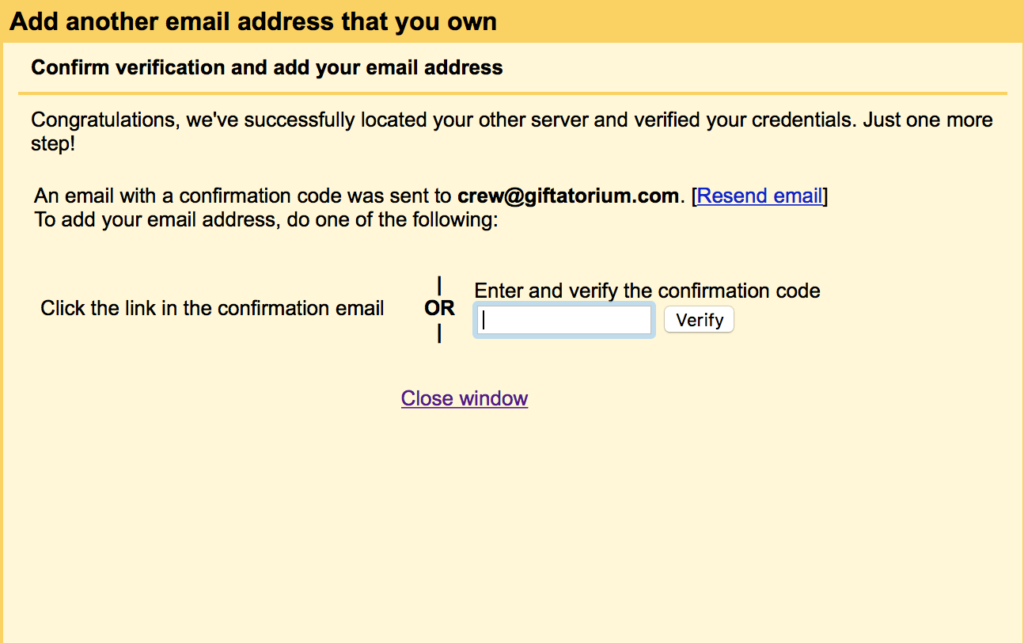
Final Step! All you need to do now is provide confirmation by clinking on the link in the email or entering the confirmation code in the email to into the confirmation box as shown below then click Verify.

You might also like…

AUTHOR: SARAH PILATI Hi, I’m Sarah! I’m here to help you create your first WordPress blog. I cover the early stages of your project – getting your website up and running! If you have any doubts you can do it yourself, this website is for you! You can get started here.


0 Comments