

One of the first things you need to do once you have set up your WordPress website, is sign up for a Google Analytics account and install the Analytics code on your website.
Google Analytics is one of the most powerful tools you can have as a blogger as it shows you exactly how your visitors interact with your site. Best of all it’s free.
Once you have installed Google Analytics to your website, you can use the tool to track all sorts of information. Here are just some of the things you can learn about your blog traffic from Google Analytics:
- How many people visit your site and when
- Audience demographics such as where your visitors come from, their age and gender
- Where your traffic is sourced such as via organic search, social media or direct
- Behaviour flow shows you how visitors interact in your website, where they enter your site and how they move from one page to another and where they exit
- Real Time tells you how many people are on your site that moment, which page they are on, where they are from and more
The Analytics code can be installed manually or by using a plugin. As promised, I’ll keep tutorials code free where possible so we’ll be installing the Google Analytics plugin by Monster Insights to do the job.
Step 1 – Create a Google Analytics Account
Go to www.google.com/analytics.com and click on Sign Up For Free.

If you have a Gmail account you can login with those account details.
Google only requires one username and password for all Google applications so you can sign in to Google Analytics with the same details as your Gmail account.
If you don’t have a Google account already, create a new Google account.
Once you have clicked on Sign Up For Free, next you need to click on Sign Up (see below).

This takes you to the Accounts page where you create a New Account.
You will need to enter your Account Name – the name of your business.
Enter your Website Name and the URL of your website.
Select your Industry Category and Time Zone.
You can keep all the Data Sharing Settings checked (I do) and then click on the blue button, Get Tracking ID.
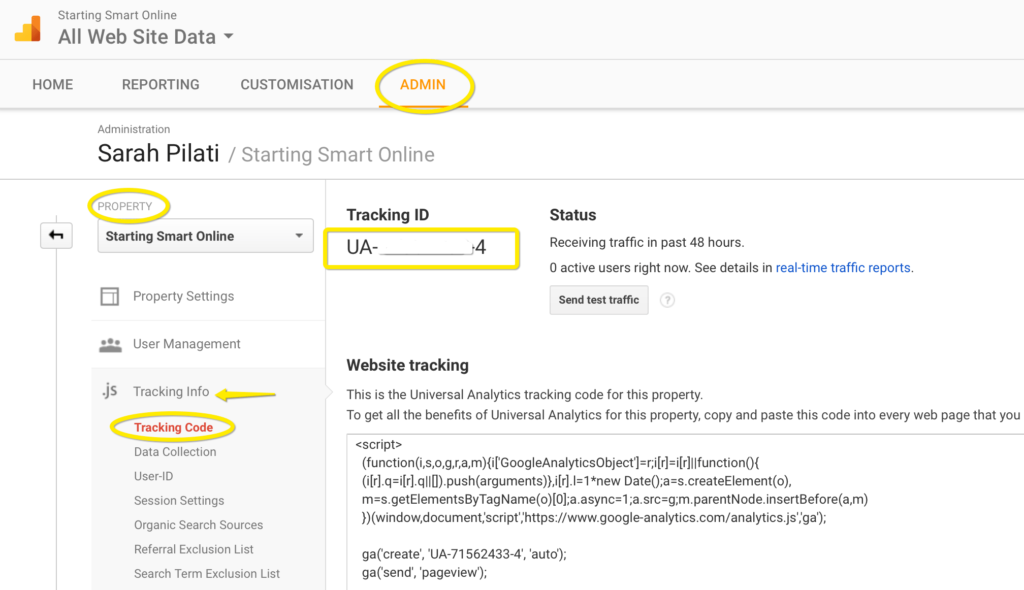
Note: In your Google Analytics account, your website is also referred to as a “property”. You can add multiple properties from which you want to collect data from.
The Tracking ID generated is for the property you have just created.
You can always locate the tracking ID under Admin in the top menu, then select the account and the property (your website) and then Tracking Info>>Tracking Code.
Step 2 – Install the Google Analytics Plugin by Monster Insights
The Google Analytics plugin by Monster Insights, enables Google Analytics on all pages with a simple installation. No code required.
Firstly, login to your WordPress website and in your Dashboard click on Plugins.
Select Add New.
Type “Google Analytics” into the search bar.
Look for the plugin by Monster Insights named Google Analytics and select Install Now.
Once installed, click the blue Activate button to activate the plugin.
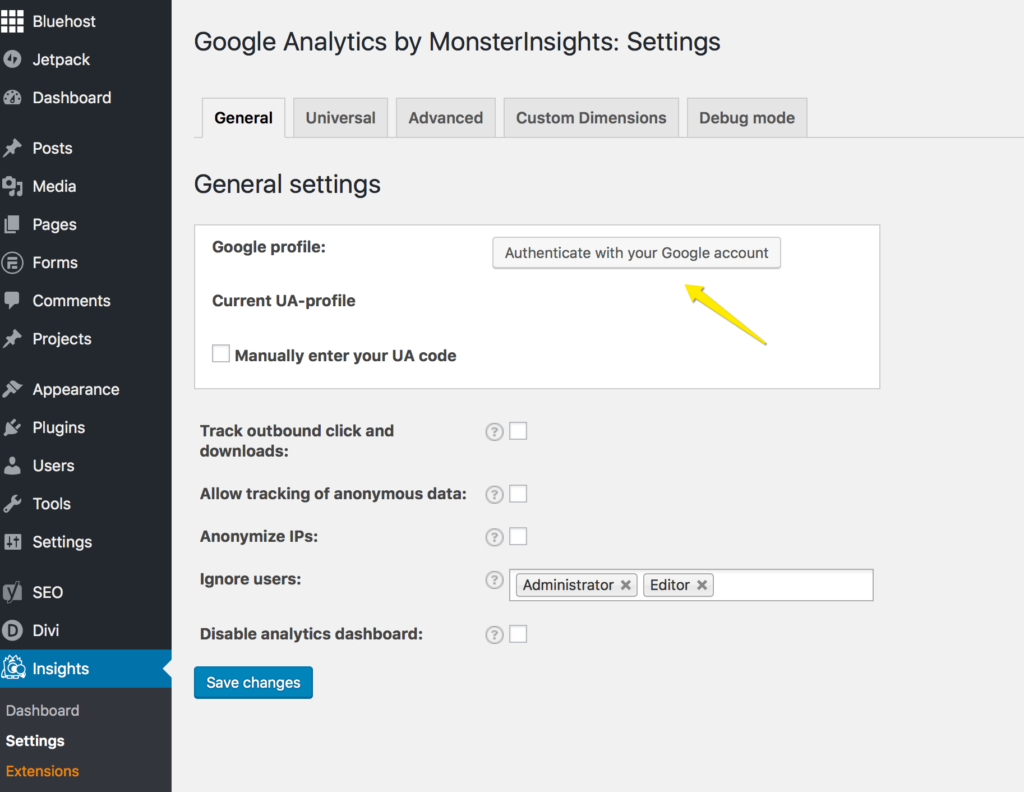
Go back to the Dashboard and hover your mouse over Insights and select the Settings option.
Under General Settings, click on the Authenticate with your Google account button.
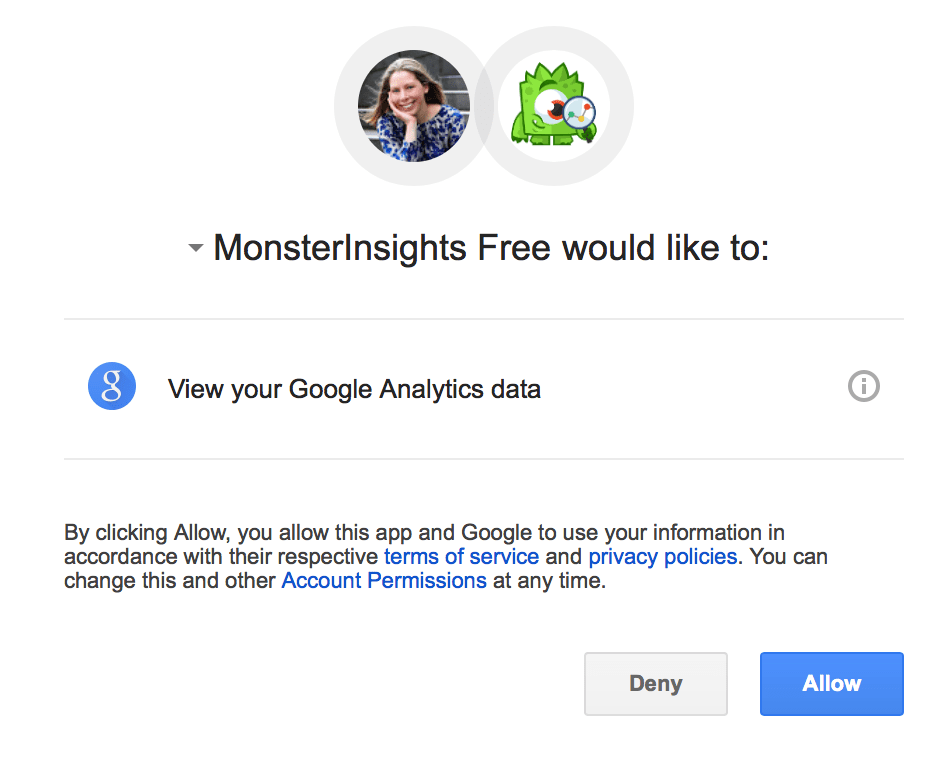
Select your Google email account if prompted.
A pop up box will appear requesting to view your Google Analytics data.
Click Allow.
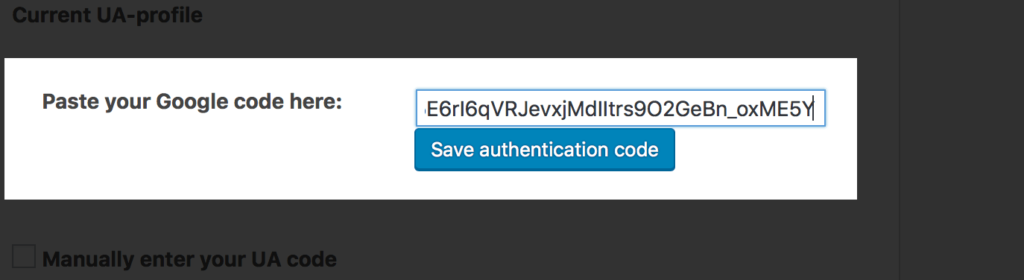
Another box will appear with code. Copy the code and paste into the second pop up box where is says Paste your Google code here. Then click on Save authentication code.
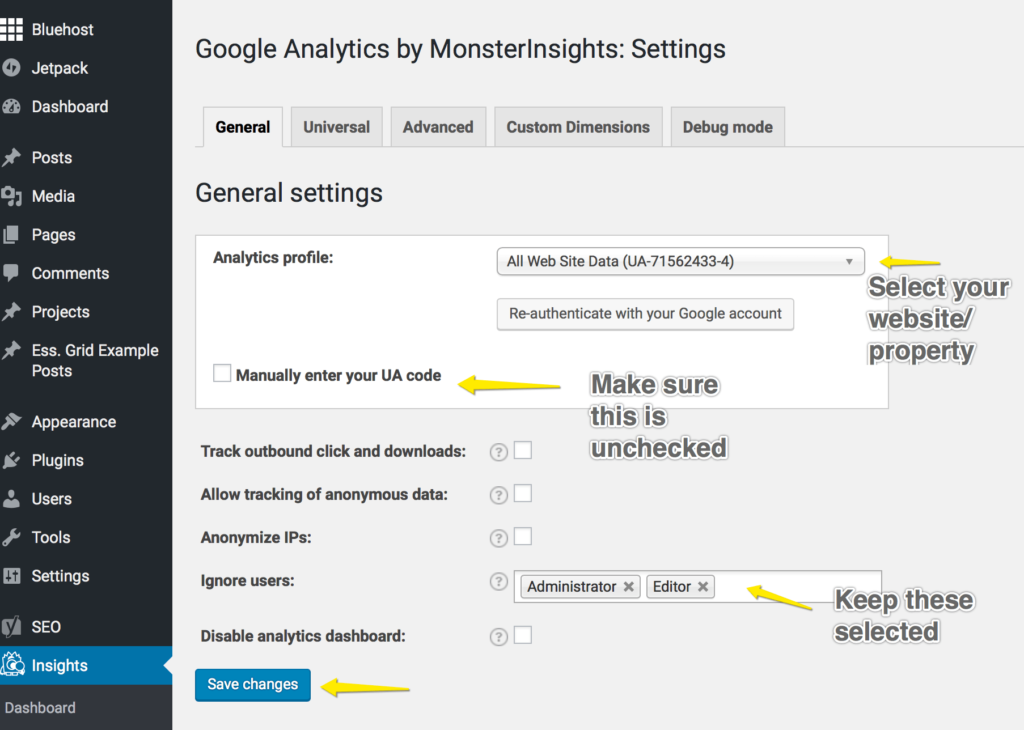
Next, you need to select a profile, that is, which website you are tracking. In the General Settings at Analytics Profile, from the drop down box, select your website and click Save Changes.
To stop Google Analytics from tracking your own activity when you are logged into your WordPress account, keep Administrator and Editor selected at Ignore Users under General Settings.
Stop Google Analytics from Tracking Your Visits from Your IP Address
Now, we will tell Google Analytics not to include your own visits to your website from your IP address in the data. You only want to include the interactions of “real traffic” and that’s not you!
First you need your IP address.
Type “how to find my IP address” into the Google search bar.
Google will return your public IP address.
Now go to your Admin panel in Google Analytics and select the Account and Property and then click on Filters.
Click on Add Filter and then select Create new Filter and give you filter a name such as “Exclude IP”.
Use the filter type Predefined.
Set up like this:
Select filter type>>Exclude
Select source or destination>> traffic from the IP addresses
Select expression>>that are equal to
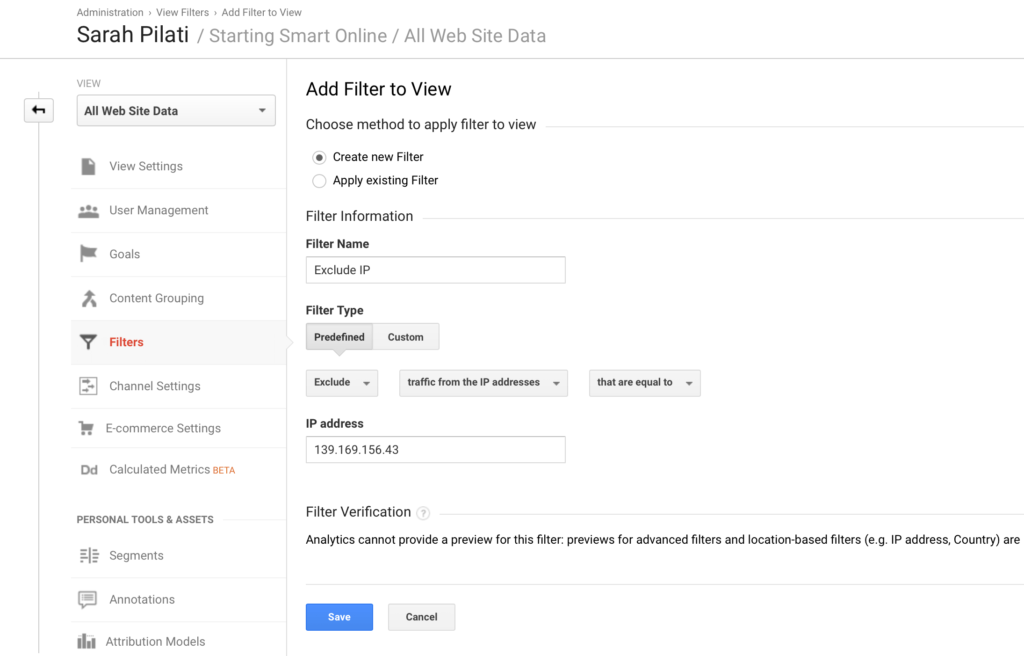
Save.
That’s it! You’re all set up to start tracking activity on your website.
Note: Make sure you check out the disclosure requirements when using web analytics. More here.


AUTHOR: SARAH PILATI Hi, I’m Sarah! I’m here to help you create your first WordPress blog. I cover the early stages of your project – getting your website up and running! If you have any doubts you can do it yourself, this website is for you! You can get started here.


0 Comments