
If this is your first blog, you’re probably feeling overwhelmed by the thought of having to optimize every post and page you create. Perhaps you’re not even sure what Search Engine Optimization is.
In this post, you’ll learn all you need to know for now: how to install the Yoast SEO plugin and how to use it.
The Yoast SEO plugin handles the technical optimization of your blog and helps you to optimize your content. As you move through the tutorials, you’ll learn that this plugin has many more features than just SEO. More on that later.
For those following the tutorials, don’t panic! Remember we are just getting you set up. You won’t be using the plugin until you start creating content. When you get to that stage, you can come back here and read over the instructions.

What is Search Engine Optimization?
When you type a search query into a search engine like Google, Google returns related links that it believes are the most relevant to your query.
The ranking of the websites that are returned as a result of a search are determined by complex algorithms that take many factors into account.
Search Engine Optimization is when you use strategies and tactics to improve your chances of obtaining a high ranking in the search results page of a search engine like Google.
So that you can increase the number of visitors to your blog, we will be installing the Yoast SEO plugin to your WordPress blog. This way, all your pages and posts will be optimized for SEO.
How to Install the Yoast SEO Plugin
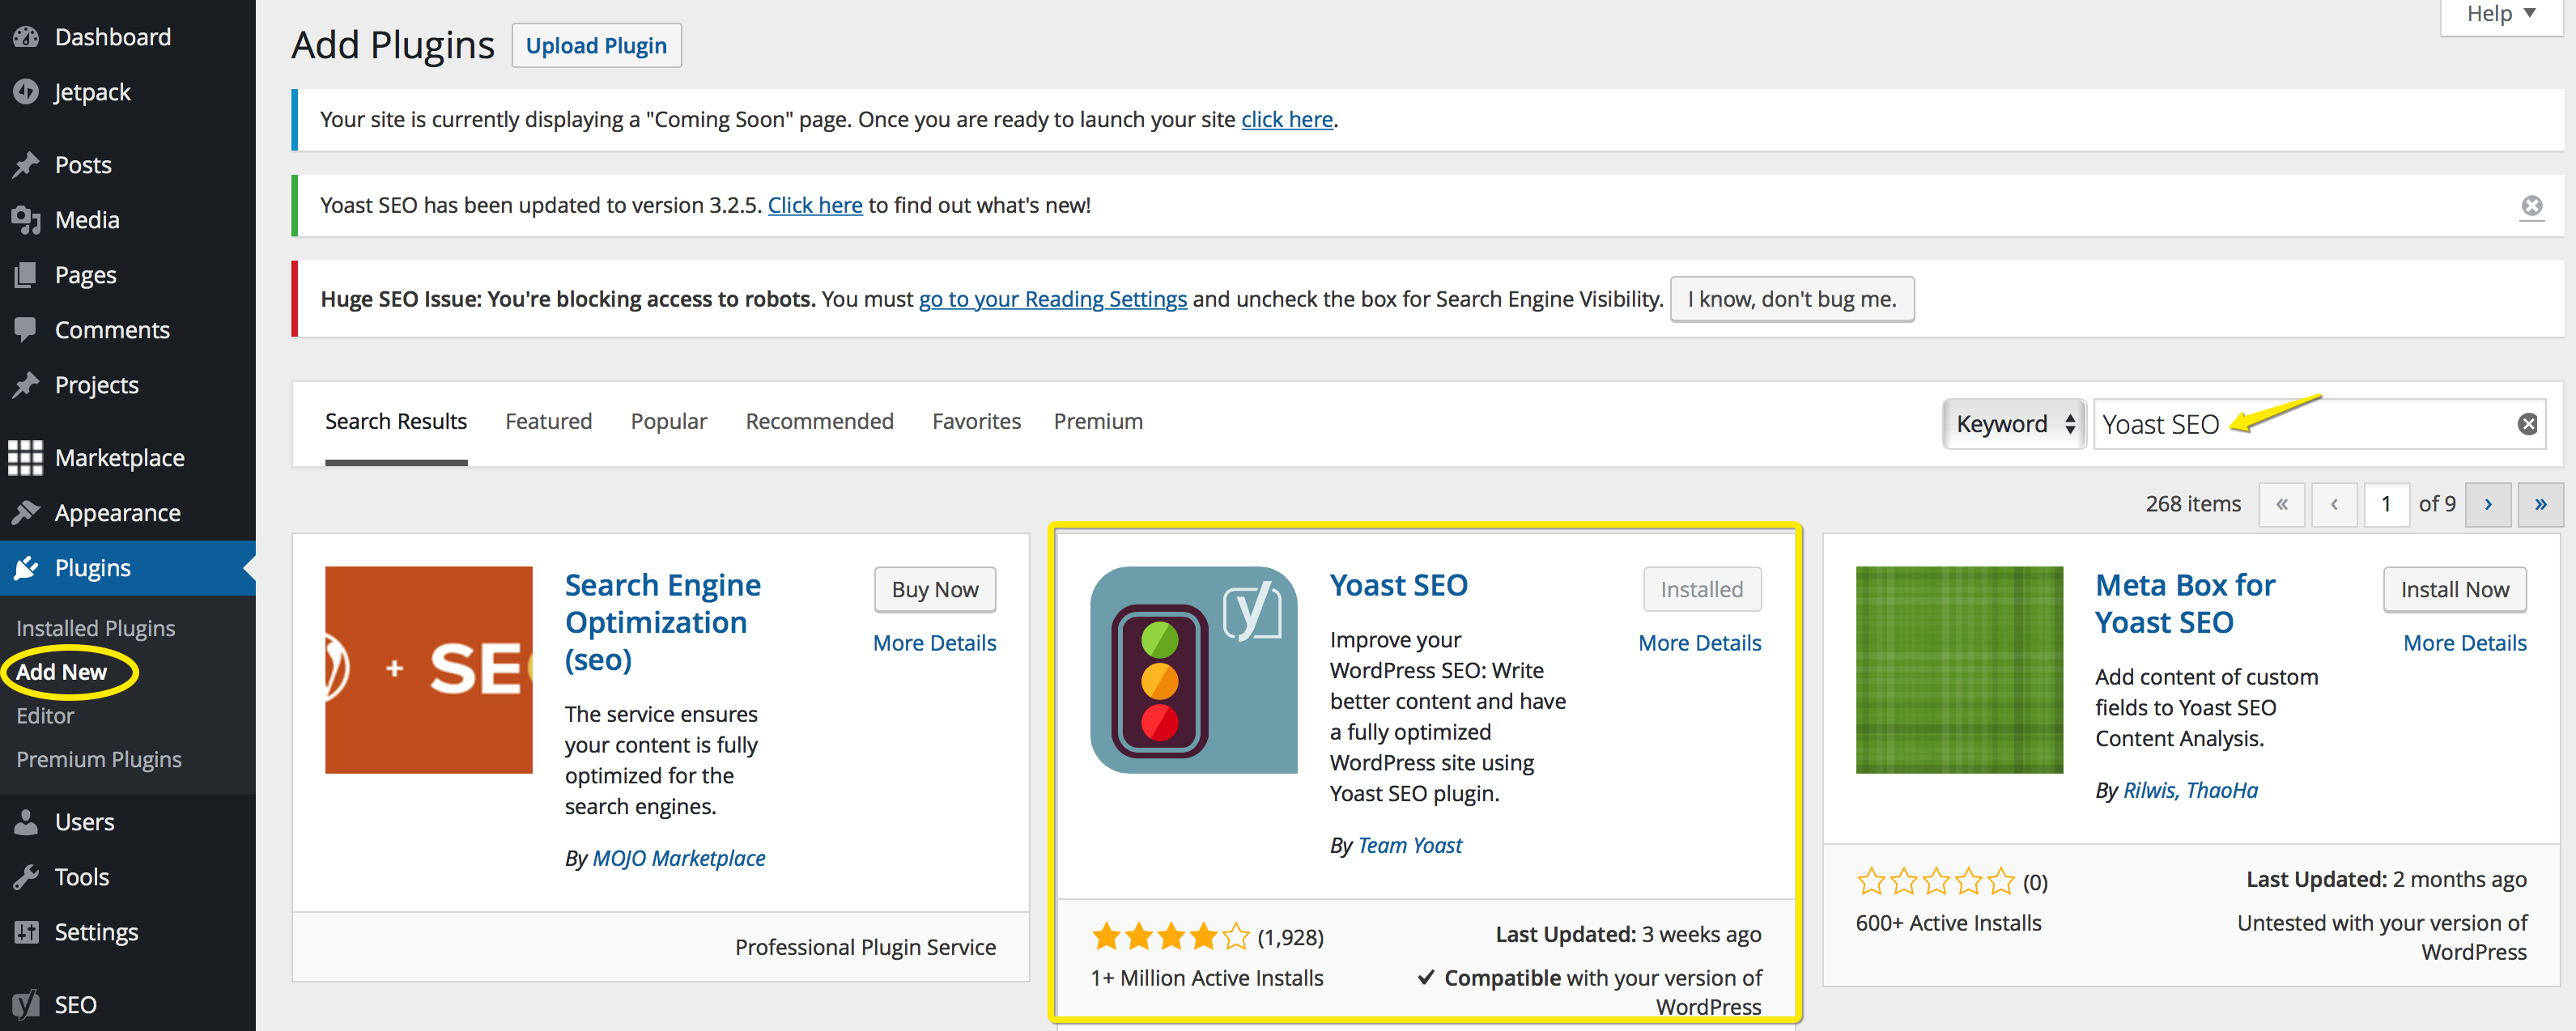
- In your WordPress Dashboard, click on Plugins
- Under Plugins, click on Add New
- Type “Yoast SEO” into the Search bar
- Install the Yoast SEO Plugin by the Yoast Team
- Click on Activate
Activate Advanced Settings
The Advanced Settings give you many additional options that you will soon discover, as you set up your website. Go to SE0 and then Dashboard.
Click on the Features tab and enable the Advanced Settings Pages. Remember to Save Changes.
Set Up the Configuration Wizard
Click on SEO in the dashboard and click on Open the configuration button.
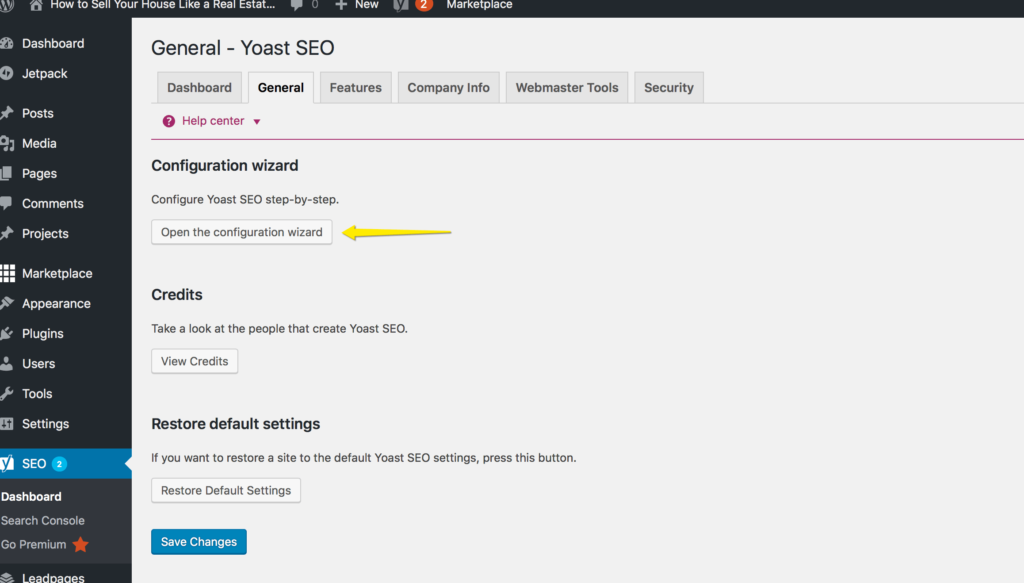
Run through all 10 steps of the configuration wizard.
In step 8, Yoast asks to fetch your Google Console information. If you have not set up your website (property) in Google Console, click on Next and you can return later to complete the configuration.
If you are following these tutorials, next you will set up Google Analytics, and will be linking the Google Search Console to your Analytics account before launching your website. You can return at any time by reopening the Configuration wizard.
How to USE the Yoast SEO Plugin
The Yoast SEO box will appear either above or below the visual editor in your page or post depending on the WordPress theme you are using. This is where you will do the work around optimizing your page.
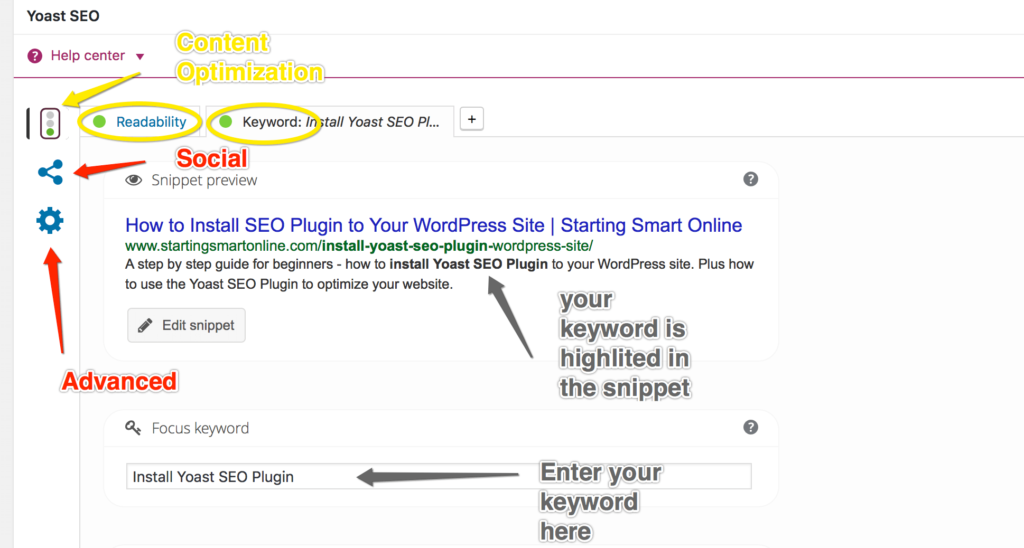
The plugin has three vertical menu options displayed as icons:
- Content Optimization
- Social
- Advanced
In this tutorial we will be focusing on Content Optimization which has two tabs: Readability and Keyword.
Content Optimization – Readability Tab
The readability tab analyses your content and checks the readability of the content.
The analysis takes into account sentence and paragraph length, the number of sub headings you have and how you distribute them throughout your page, the presence of passive voice and transitions words and the Flesch test which is how easy your content is to read.
Using your scores, you can rework your content until you achieve the green light. You don’t need a green light for every check to obtain an overall green light.
Content Optimization – Keyword Tab
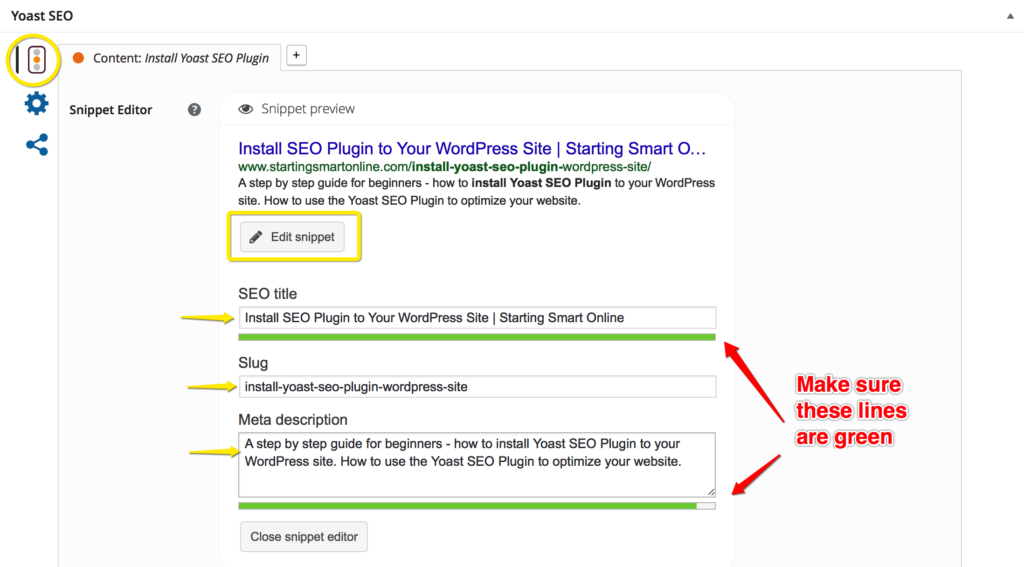
Snippet Preview:
The Snippet Preview predicts what the website page will look like when returned in someone’s search results on Google. To edit the Snippet click on the “Edit snippet” button just under the preview or click on the Snippet itself. Here you can edit the SEO title, Slug and Meta description.
- SEO Title – You will see that the box defaults to the text in the Snippet Preview. If you want to change this, just type in the text you want to appear when someone returns your website page in their search results.
- Slug – The slug is the extension to your website’s URL for that page or post. This can be changed here.
- Meta Description – The Meta Description is the text (limited to 156 characters) that appears below the SEO Title and URL in a Google search and is used to describe what the reader will find on the page. When you write your meta description make sure you include your key word. If you do not, Google will return a random snippet from your content that does include the key word.
Focus Keyword:
The Focus Keyword is the word or words that you will be using to describe your web page. Keywords are the words that Internet searchers type into search engines to find what they are looking for. If you have done your keyword research both of these should match.
Analysis:
The Analysis area shows the measurements used to determine how optimized your page is and makes recommendations for improving your page for better SEO.
You goal is to get the green light which tells you your page is good to go.
You may need to update your page or save your post as a draft for Yoast to register the changes that you have made in order to analyze your page.
The final green light that you require is at the top of the Yoast SEO box. When green, Yoast considers your page good to go. You don’t require a green light for every measurement to achieve an overall green light.
Note: Check Your Permalink

The text highlighted in yellow shown above, is the post name as it appears in the URL. If your “slug” for the page or post is not displayed in the URL as shown in the above example, go to Settings in your Dashboard, select Permalinks and check Post name.
Click here for more information on the Yoast SEO Plugin.


AUTHOR: SARAH PILATI Hi, I’m Sarah! I’m here to help you create your first WordPress blog. I cover the early stages of your project – getting your website up and running! If you have any doubts you can do it yourself, this website is for you! You can get started here.


0 Comments